


“Here to Help” is a support column written especially for Formstack’s awesome, loyal customers.
It’s official: People prefer to make most of their purchases online. A survey by comScore and UPS revealed that consumers tipped the scale with online shopping in 2016, buying more products online than in stores for the first time ever. If you’re not offering your customers a way to complete transactions online, now’s the time. But we’re not an ecommerce company, you say. No matter. Regardless of what people are purchasing, they’re more likely to complete a transaction if they can do it online. Nothing beats the convenience of secure online payment processing.If you don’t know where to start, don’t panic. That’s why we’re here! In this post, I’ll walk you through the basics of using your Formstack forms to begin accepting payments online for everything from event tickets to donations.
1. Pick a Payment Gateway Integration
If you accept payments in person, there’s a good chance you’re already using a payment processor that integrates directly with Formstack. If you’re not currently using a payment gateway service, you have two options:
Off-form integrations redirect your customers to your payment processor’s website to complete payment, and they are most commonly used with services like PayPal.
On-form integrations allow the customer to enter credit card details directly into your Formstack form. This type of integration typically takes a little longer to set up since it requires mapping credit card fields to your payment processor.
For help determining which payment gateway is best for your business, take our payment gateway quiz.
2. Set Up Your Form to Accept Payments
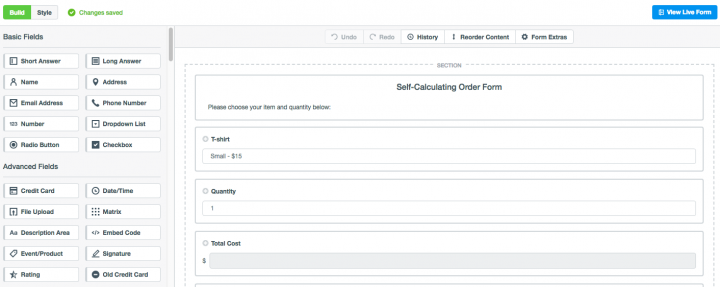
Before you can begin accepting payments, you’ll need to add the right fields to your online form. We’ve removed a lot of the guesswork from this step with templates that are accessible within the form builder.For example, if you’re selling items that people may want to purchase in bulk quantity, you can start with our self-calculating form template. Within the Forms tab, select Create New Form > Start with a Template > Sales > Self-Calculating Order Form.

This will bring up a pre-populated form you can customize with the correct labels, prices, and quantity options.
If you’re using an on-form payment processor, you will need to enable SSL and add a credit card section.

Note: A Credit Card field isn’t necessary for off-form processors like PayPal, since your user will be redirected to another site to submit payment after completing your online form. For more tips you can use to create a standout payment form, check out our Creating the Perfect Consumer Transaction Experience with Online Forms post.
3. Integrate Your Payment Processor with Your Form
Once your online form is ready, the next step is to connect it to your payment processor. Navigate to Settings > Integrations > Payments and click Add next to the payment gateway you use.
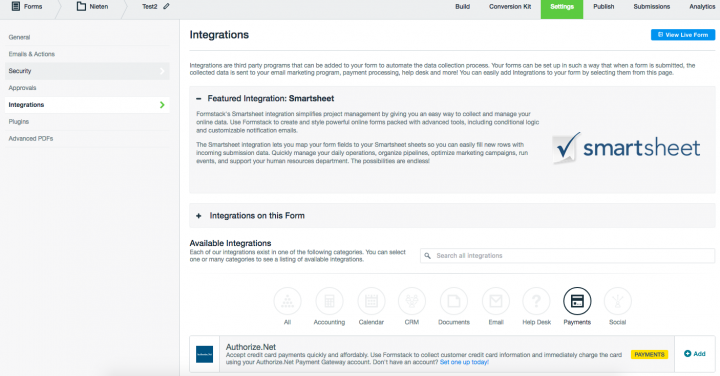
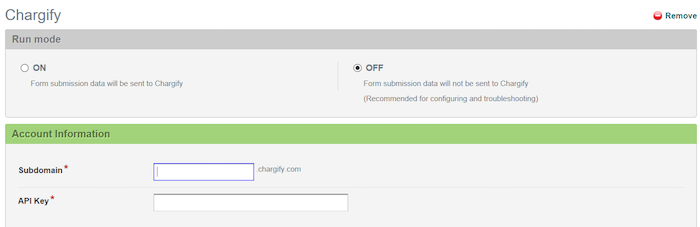
You will be asked to enter your payment processor account information, such as the email or subdomain associated with your account and an API transaction key or login ID. At this stage, be sure to select TEST or OFF under Run mode until you are ready to officially begin accepting online payments.
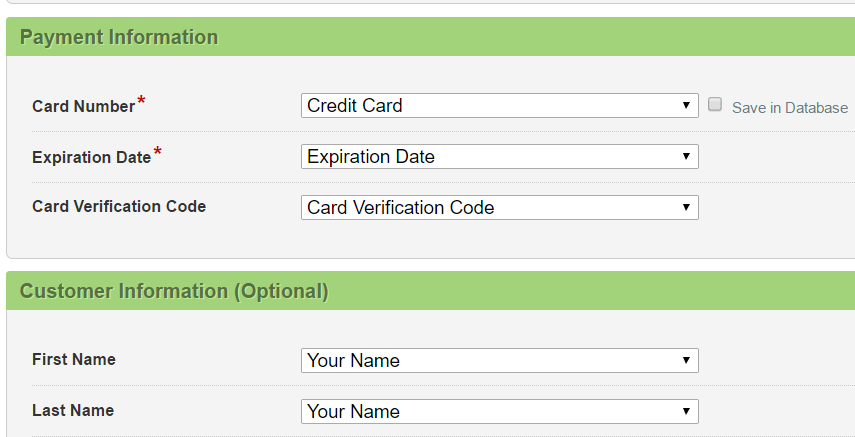
Once you have entered your payment processor credentials, the last step is to map your form fields to your payment processor’s integration settings.
For more step-by-step guidelines on how to set up different types of payment processor integrations, as well as tips for avoiding common mistakes, use this guide or search for your specific payment processor in our support center.
Accepting payments on your online forms is a great way to meet customers right at the moment they’re ready to buy from you—but it’s only half the battle. Many of our customers struggle to determine which payment gateway integration will be most efficient and affordable. Our comparison chart includes everything you need to know to make an informed decision. Click the link below to review it now.

